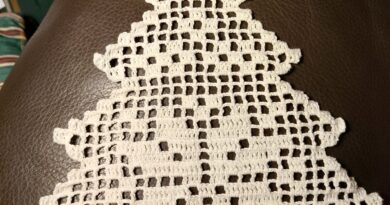
The Cutest 3D Christmas Tree Applique You’ll Ever See! (Free Pattern)
If you are scanning the internet for festive, high-yield free Christmas crochet patterns to design gorgeous tree ornaments, holiday garland accents, or luxury handmade gift packaging, this 3D Layered Christmas Tree Applique is an absolute masterpiece.
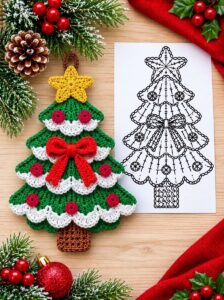
Holiday decor trends focus heavily on dimensional shapes and rich color contrast. This specific design stands out because it builds the tree in tiered layers of deep forest green, topped with crisp cream scalloped edges that perfectly mimic fluffy snow. Adorned with a vibrant red ribbon bow, mini crimson bobbles, and a glowing yellow star loop at the peak, it forms a gorgeous festive motif that commands premium prices at winter craft fairs.
In this pro-level crochet tutorial, we break down this beautiful stitch structure using standard American crochet terms (US notation), complete with a project size and yarn yield scale so you can plan your festive production with precision. Let’s get stitching!
🧶 Materials and Tools Needed
To reproduce the stunning, vibrant holiday look displayed in our featured ateliê layout, prepare the following supplies:
- Yarn: DK weight (#3 Light) or Worsted weight (#4 Medium) premium cotton or acrylic yarn.
- Color A: Forest Green (Tree tiers)
- Color B: Cream / Off-White (Snow scallop borders)
- Color C: Holiday Red (Ribbon bow and ornament balls)
- Color D: Sun Yellow (Top star loop)
- Color E: Chocolate Brown (Tree trunk base)
- Crochet Hook: Size G/6 (4.0 mm) or H/8 (5.0 mm) to keep the structural stitches tidy and firm.
- Tapestry Needle & Scissors.
📊 Project Size & Yarn Yield Strategy Guide
Structuring a premium blog post or calculating stock for a holiday craft market requires precise technical math. Use this reference chart to estimate your dimensions and thread consumption:
| Project Version Style | Average Finished Dimensions | Intended Structural Use | Estimated Yield (Per 100g Skein) |
|---|---|---|---|
| Mini Holiday Ornament | Approx. 4.0 x 6.0 inches | Tree hanging / Gift Tag | 8 – 10 Full Appliques |
| Festive Wall Hanging | Approx. 8.0 x 12.0 inches | Front door banner decor | 2 – 3 Large Scale Trees |
| Cozy Mug Rug / Coaster | Base layers flat setup | Table setting accent | 12+ Individual Units |
📝 Pattern Notes & Abbreviations (US Terms)
- ch: chain
- sl st: slip stitch
- sc: single crochet
- hdc: half double crochet
- dc: double crochet
- tr: treble crochet
- inc: increase
- Shell (Scallop Fan): 5 double crochets (5 dc) worked into the exact same stitch or space to form the snow trim.
📸 Step-by-Step 3D Layered Christmas Tree Tutorial
Part 1: The Layered Green Tiers (Worked Flat)
The tree consists of 3 expanding green triangles stitched sequentially or layered behind one another as shown in the graph blueprint.
- Row 1: Using Forest Green yarn , ch 4. Work 2 dc in the 4th ch from hook. Turn.
[3 dc] - Row 2 (Expansion): Ch 3 (counts as 1 dc). 1 dc in the same base stitch. 1 dc in next st, 2 dc in the last st. Turn.
[5 dc] - Row 3: Ch 3, 1 dc in same base st. Dc across to the last st, 2 dc in the last st. Turn.
[7 dc] - Rows 4 – 8 (Building Tiers): Continue increasing on the edges to form a clean flat triangle. At the end of Row 8, fast-off and repeat the process to build a medium and a large triangle panel. Lap them over each other and sew them together along the top ridges to form a stepped pine silhouette.
Part 2: The Scalloped Snow Borders
- Attach your Cream yarn to the bottom raw edge of any green tier.
- Ch 1, sc in the first space. Sk 1 stitch, work a Shell (5 dc) into the next stitch, sk 1 stitch, sc in the next.
- Repeat from * to * across the base row to create the gorgeous wavy snow clusters. Fasten off.
Part 3: The Festive Embellishments
- The Trunk: Join Brown yarn to the bottom center of the largest tier. Work 8 rows of solid sc back-and-forth over 10 stitches to build the sturdy trunk block.
- The Red Bow: With Red yarn , ch 30. Sl st to form a loop. Pinch the center and wrap red yarn tightly around the middle 10 times to form a crisp bow knot. Sew to the middle tier.
- The Top Star Loop: With Yellow yarn , make a magic ring. Ch 3, sl st back into the ring repeat 5 times to form a 5-point star starlet. Before cutting, ch 12 and sl st back to form a strong hanging loop.